The one thing I alwayssss wanted to do was try SLA printing, and I finally got the chance! After writing my thesis on zero-knowledge proofs, I had 20 ECTS left and decided to take a fabrication course for the first time. I’ve always enjoyed playing with hardware, electronics and 3D printing, but mostly as hobbies squeezed in around school and life. Then I looked through the course catalogue and realised I could get academic credit for stuff I already do for fun! Do I wish I’d thought of that at the start of my master’s? Hell yes. But oh well, it’s never too late.
I annoyed three people, sent a few emails, and sort of convinced them to let me take digital fabrication courses without the formal prerequisites in my last semester at uni. And damn, I’d forgotten how much fun it is to combine computation, aesthetics and people.
For Engineering Interactive Technologies with Michael Wessely, our group worked with the wonderful Yijing, a PhD candidate, on her project exploring whether you could type using your tongue. The idea was to place a custom flexible printed circuit (FPC) on a custom 3D-printed dental appliance. Capacitive touch pads could detect which one the tongue touched, then map that input to a letter. A very cool project, and my first excuse to try SLA printing!
Typing with your tongue sounds a bit silly at first, but for people who can’t use their hands, because of paralysis or limited motor control, the tongue is one of the few parts of the body that stays fast, precise and under their own control. It could be handy when your hands are busy, too. The tricky part is that an interface that lives in your mouth has to fit one person’s teeth almost perfectly, be thin enough not to get in the way of talking or swallowing, and be made of something safe to keep in your mouth all day. You can’t buy that off the shelf. You have to make it for each person, which is exactly what got me excited: personal fabrication with a very real reason to exist.
I was mainly working on the fabrication side for the first half of the project. Here are the steps, in order! I’ll add more photos and videos from the lab as I find or take them.
1. Take a negative impression
We started by taking an impression of the teeth to make a negative mould.
2. Fill it with plaster
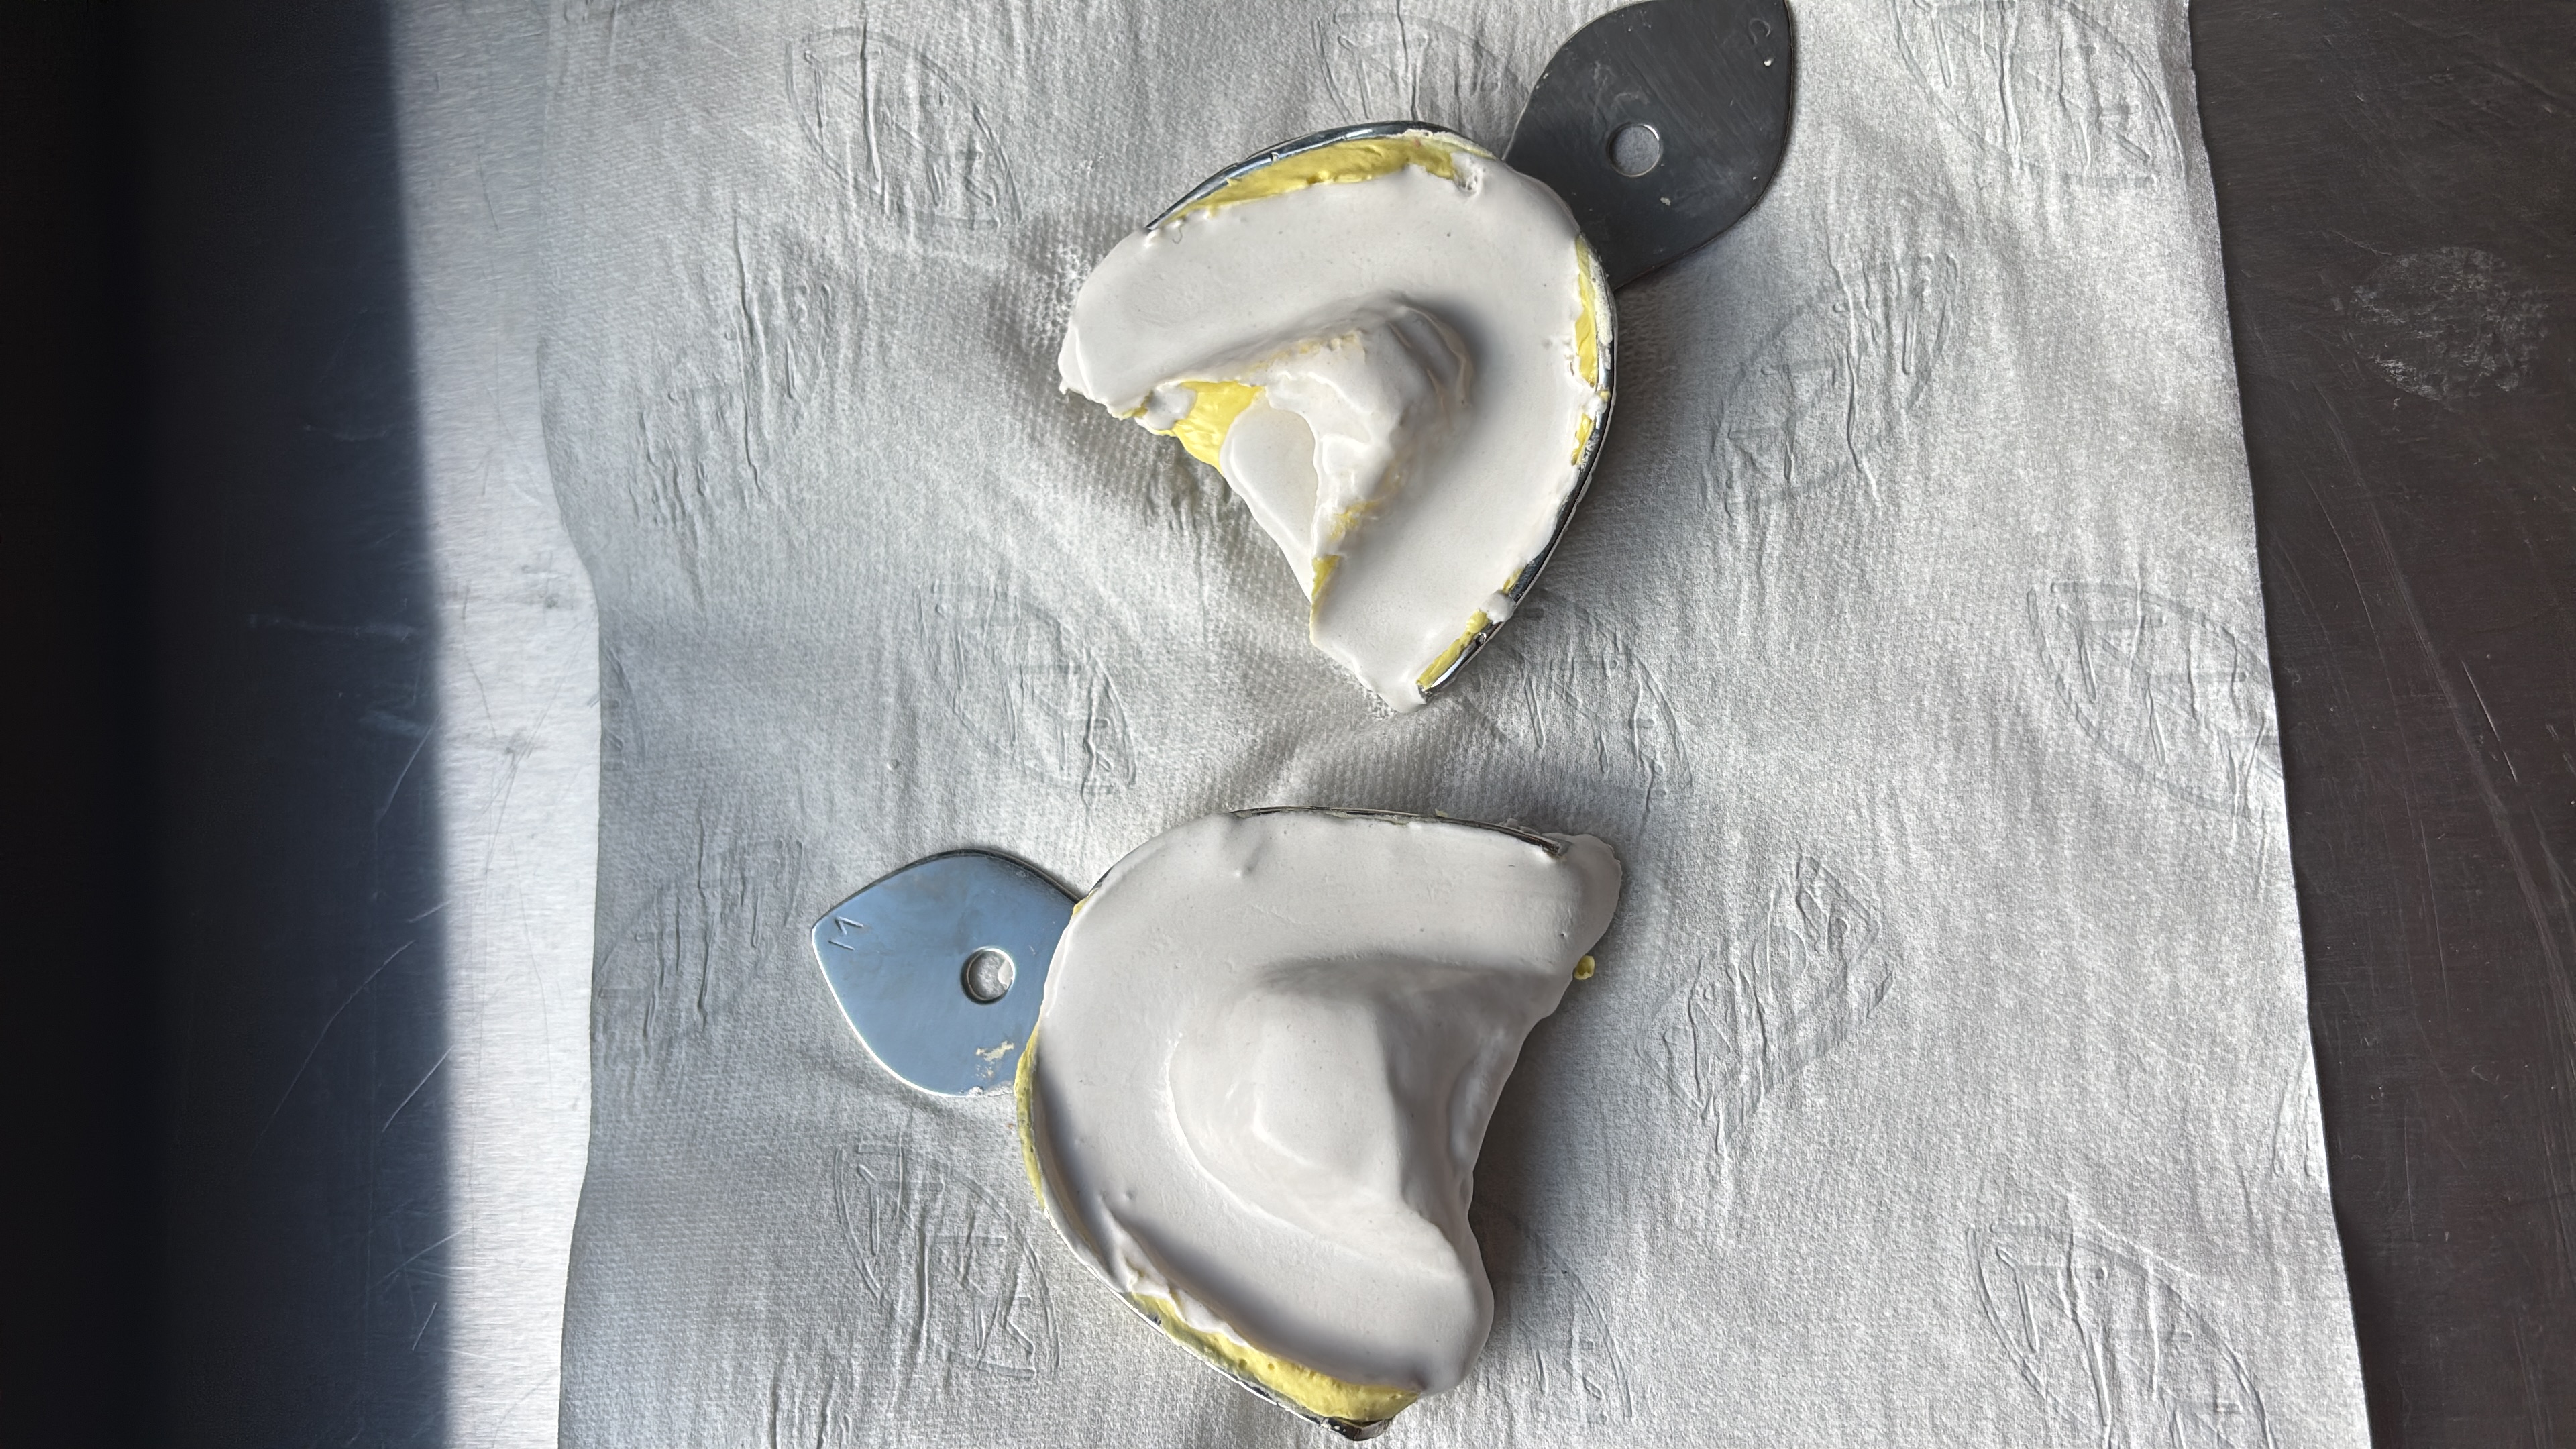
We filled the impression with plaster of Paris (POP) to make a model of the teeth. A slightly messy start, but now we had something real to scan and work from.
The plaster mould
3. Scan it with Polycam
I scanned the plaster model with Polycam using photogrammetry: light and shadows, not LiDAR. That meant the scan didn’t know its real-world size, so I had to scale it later.
Photo/video from the scanning process to come.
4. Blender!
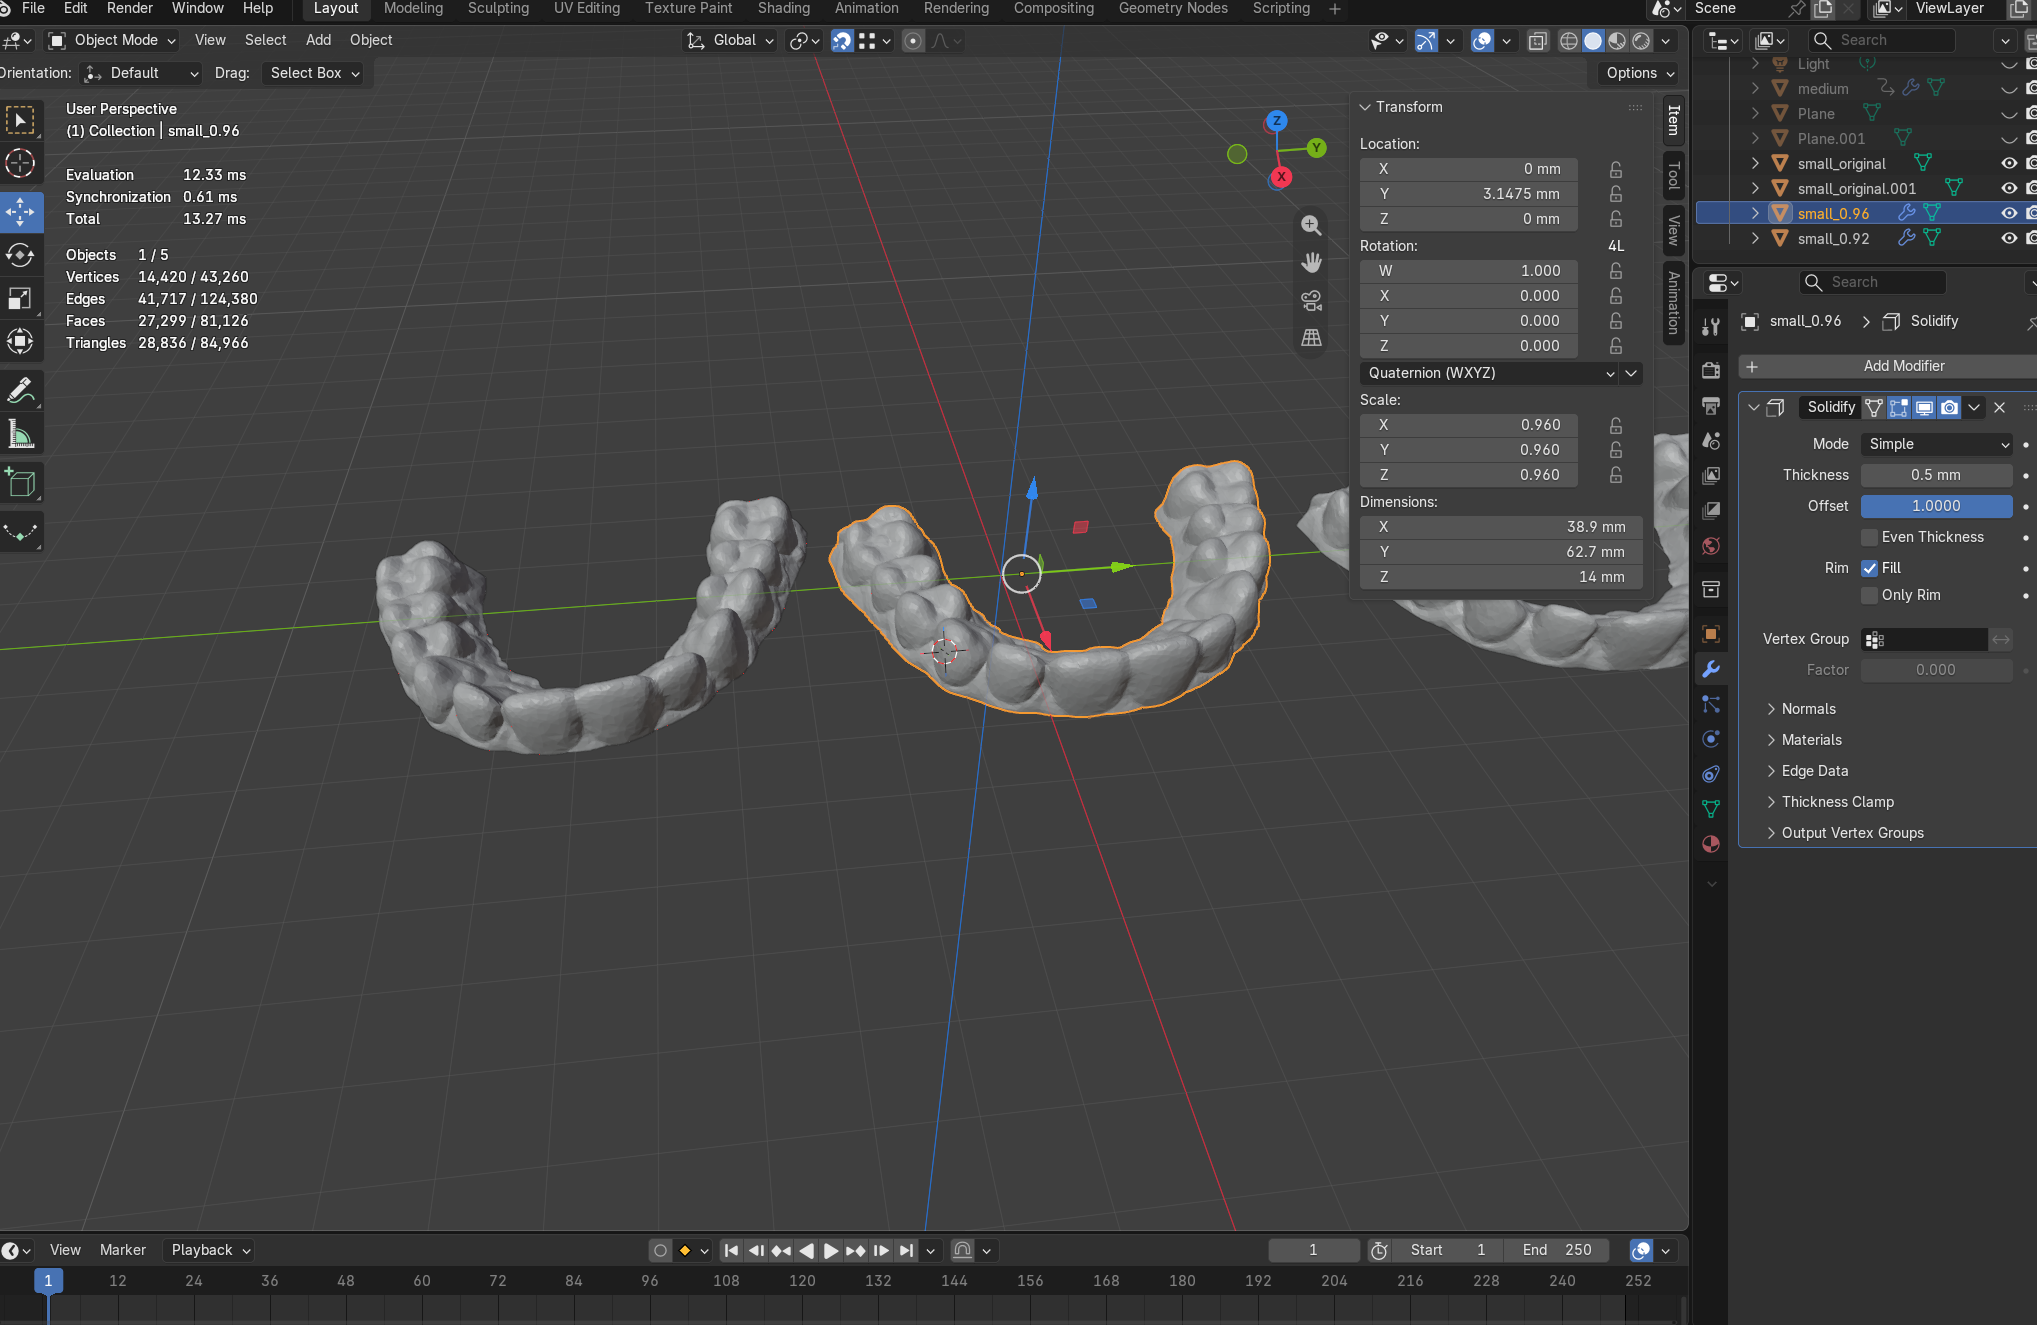
This was quite fun and new. I’d mostly used Fusion 360 before, but learning Blender was already on my to-do list, especially since I want to use more free and open-source software. I scaled the model, cut off the base and back plate, removed the gums, and gave the appliance walls a 0.5 mm thickness.
Shaping the dental model in Blender
5. Export and slice the model
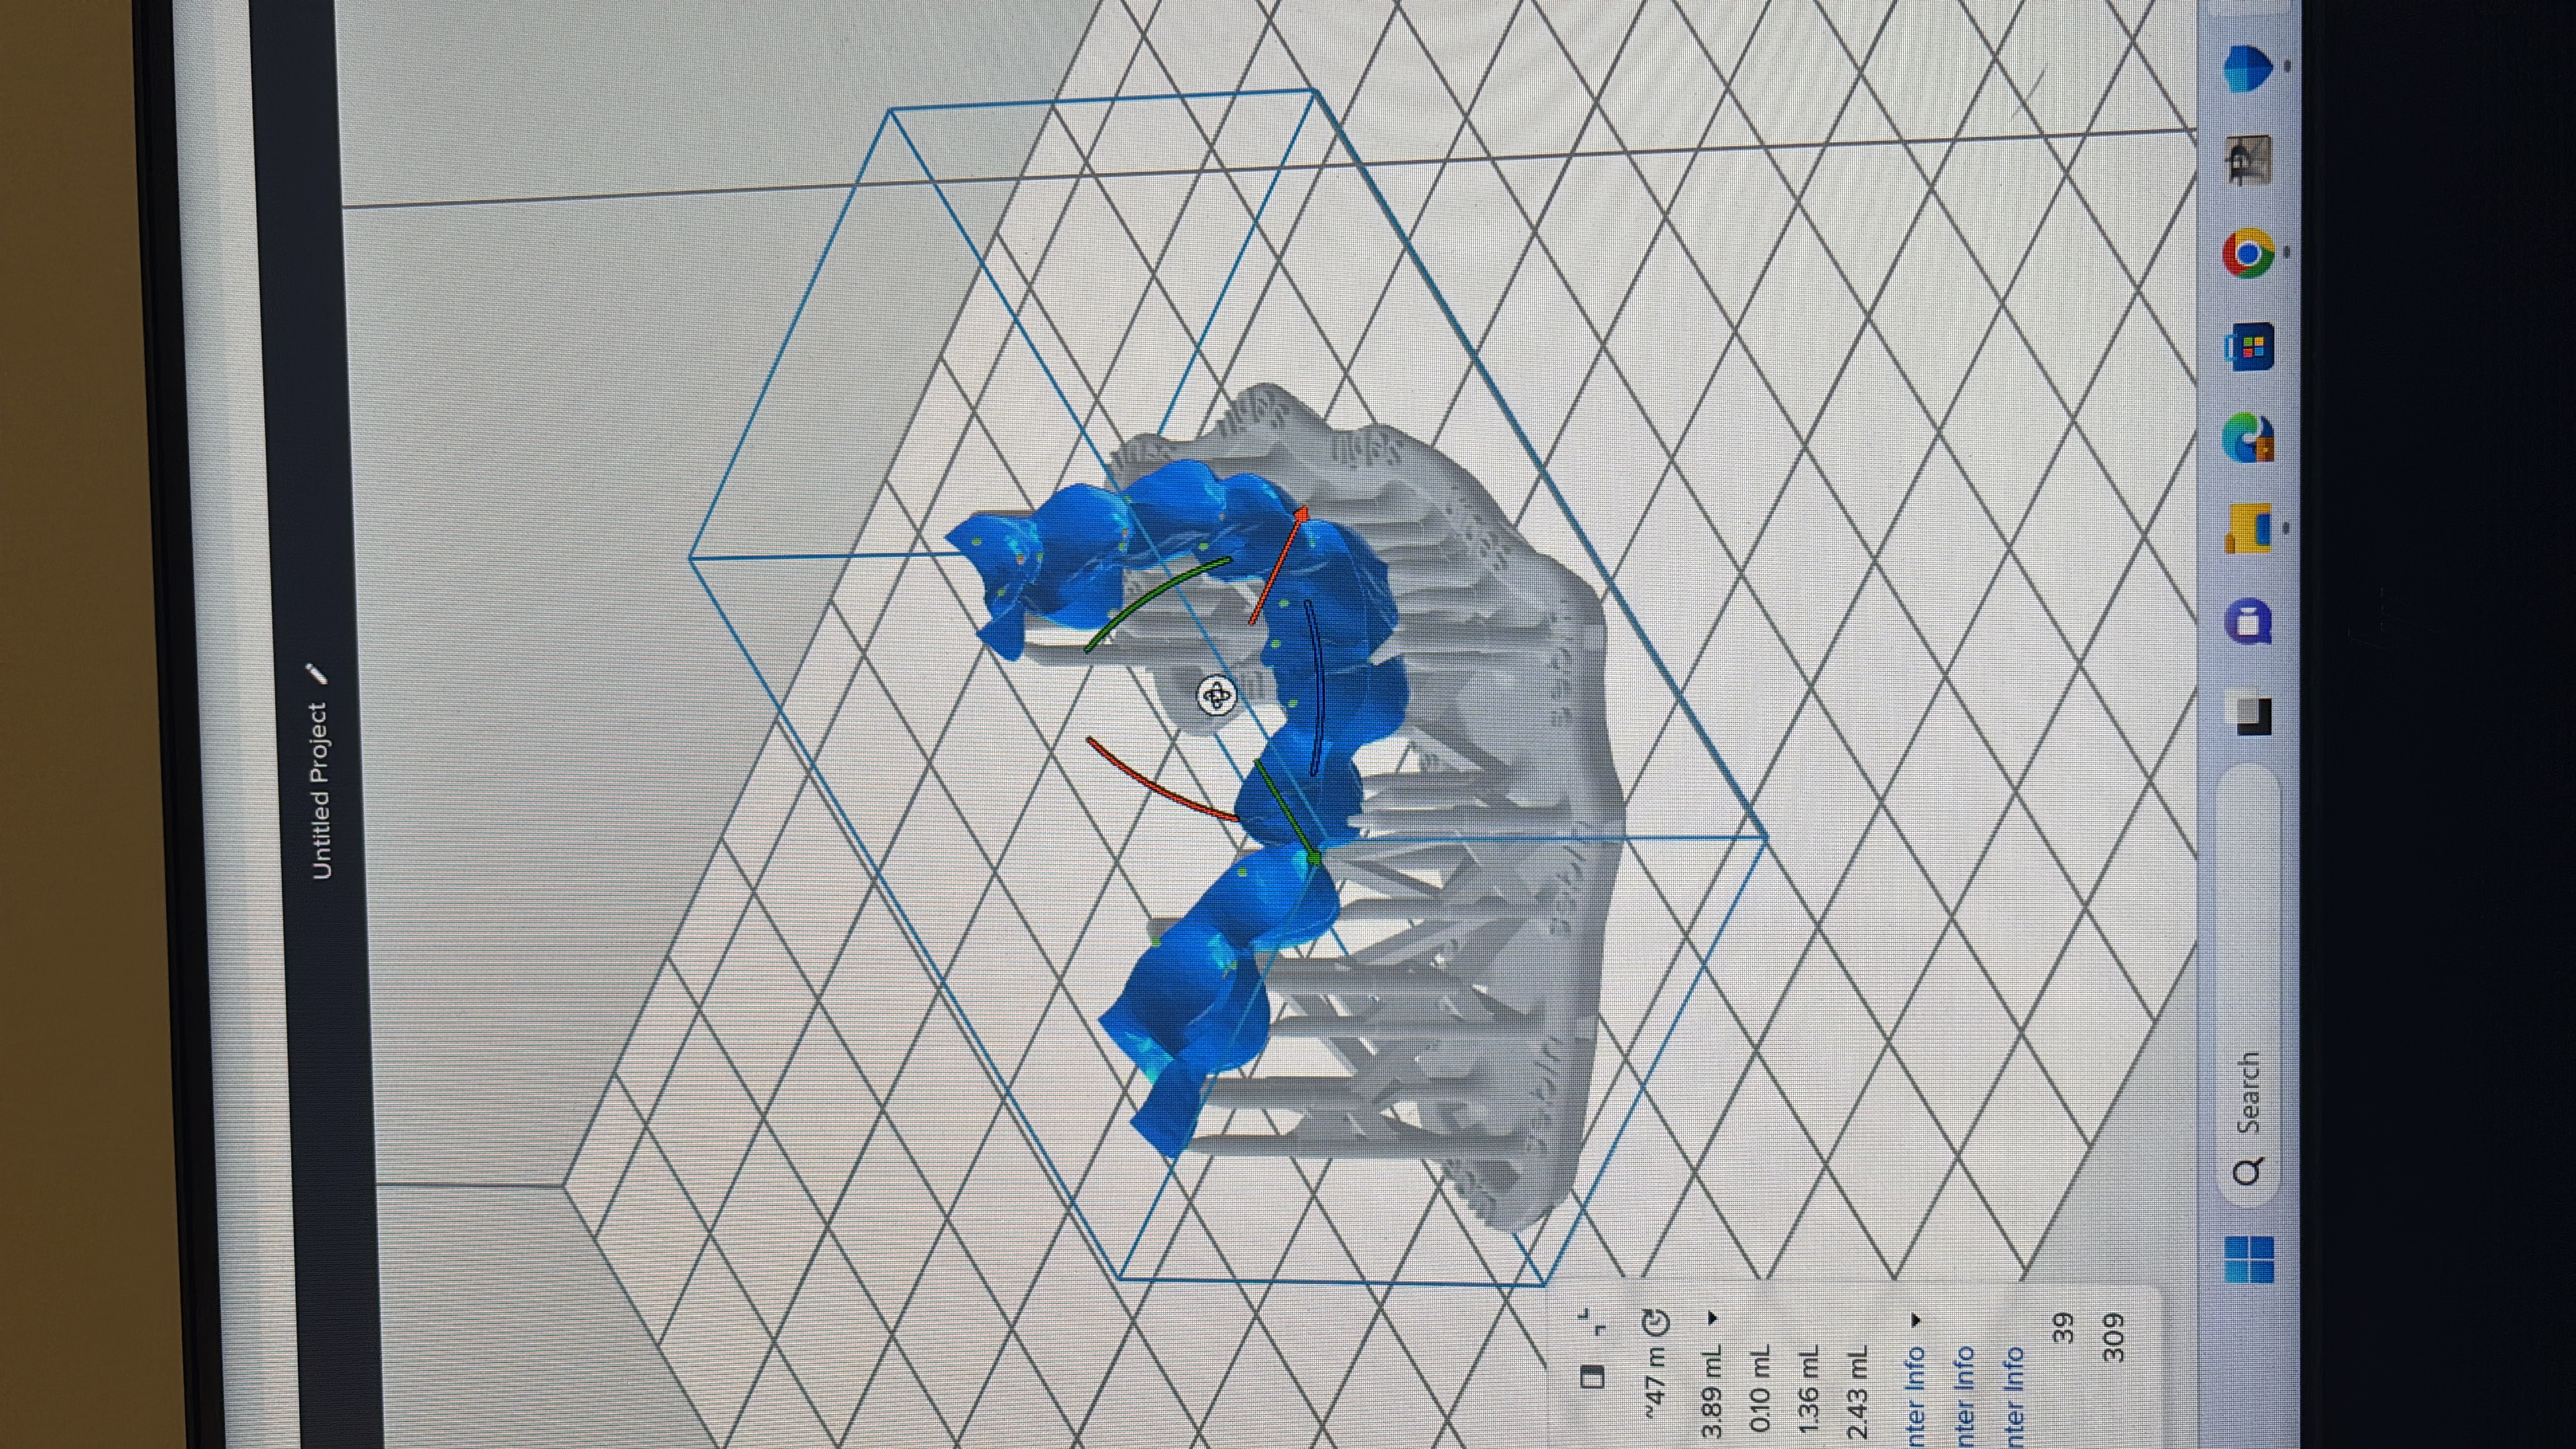
Okay, this part was tricky. PreForm, the slicer for the Formlabs printer, only runs on Windows or macOS. The printer also needed to be connected to a laptop to start the print, so I couldn’t just slice it on my own machine and send the file to my groupmate.
The model in PreForm
6. Print!
The Formlabs printer printed the prototype using Dental Comfort v1.1 resin. Watching the model turn into a real object was very satisfying.
Photo/video from the print to come.
7. Wash the print
The recommended process called for IPA in an ultrasonic bath, but I wasn’t comfortable using that setup. Instead, I used a still IPA wash for 20 minutes, then agitated the print in two IPA baths for a minute each.
Photo/video from washing to come.
8. Cure it
The instructions called for heat at 60°C and UV light together, but our lab’s curing chamber couldn’t do both at once. I applied the heat and UV one after the other instead.
Photo/video from curing to come.
9. Remove the supports and test fit
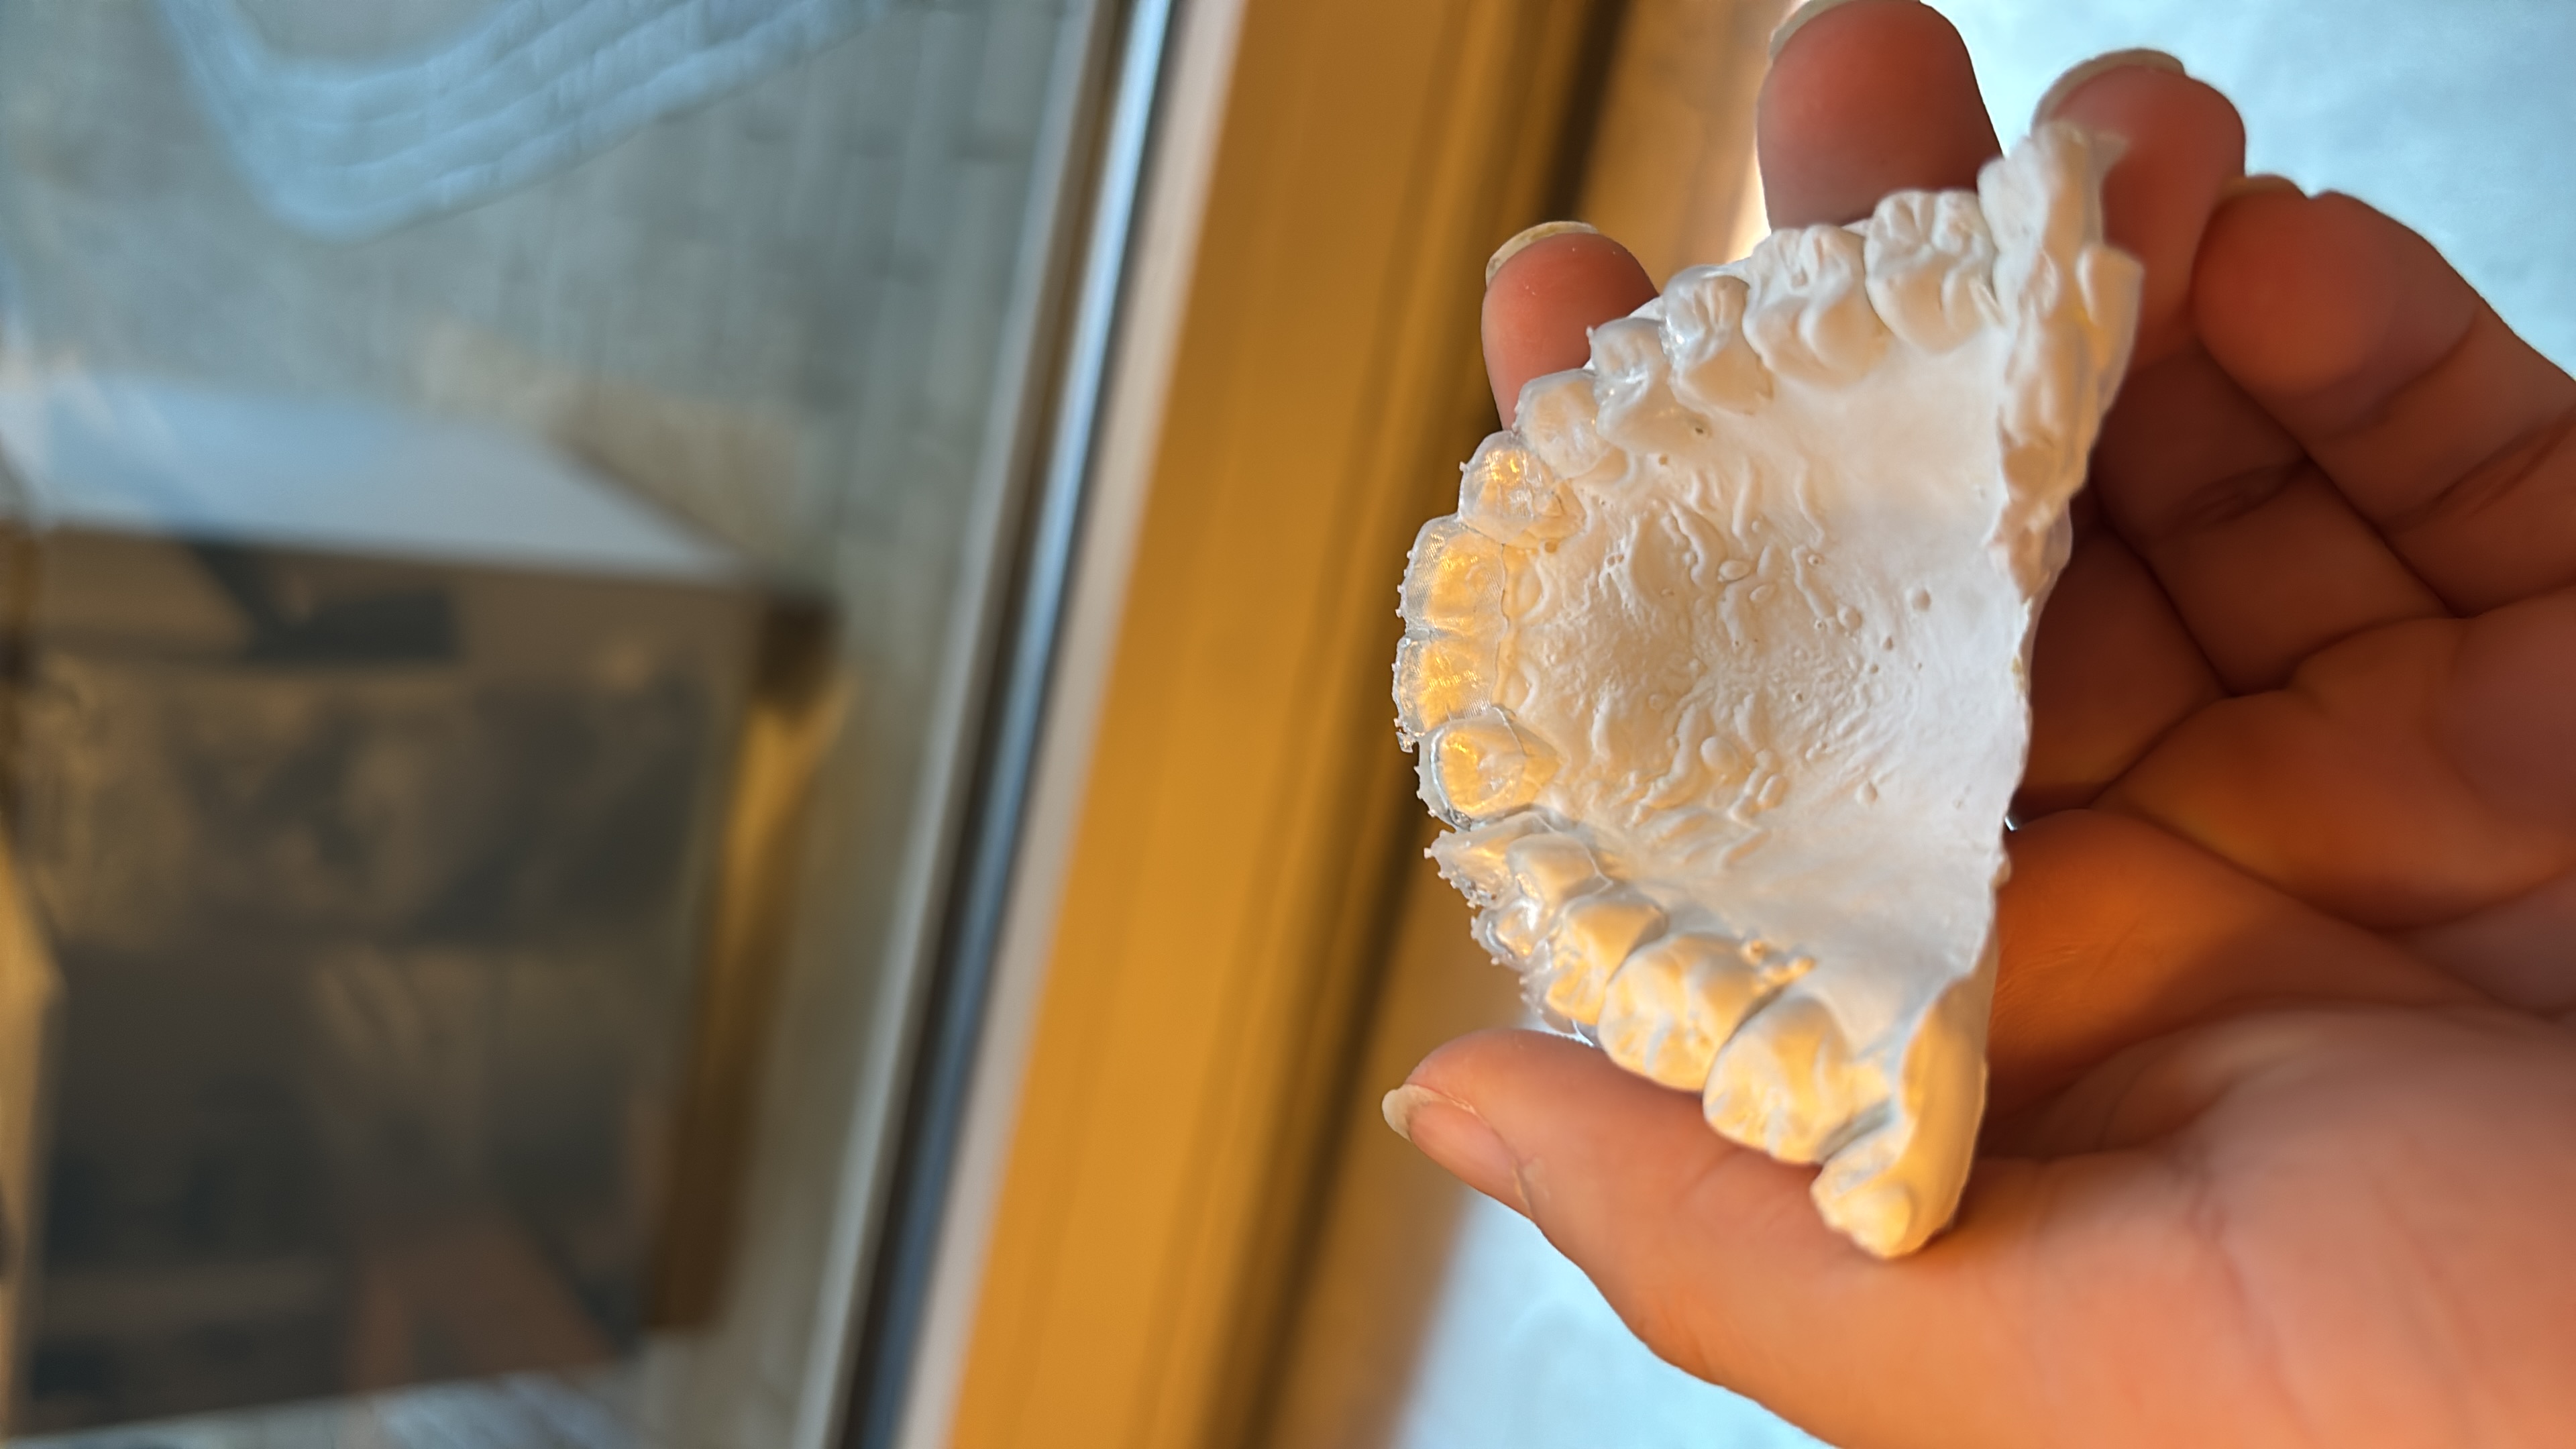
Removing the supports was honestly the most annoying bit. Then came the test fit!
Testing the fit
10. Figure out what went wrong and test again
Of course it didn’t work perfectly on the first go, haha. We looked at what needed changing and tried again. That’s the satisfying part of making a real thing: you can hold it, see what’s off, and work out what to do next.
More test-fit photos/videos to come.
This is a course-project prototype that we’re still working on, not a finished medical or dental device. But it was a very fun first dive into SLA printing, and a lovely reminder that I really like making things with people.